
How to Create a New Contact
In the contacts tab, you can create new contacts and add important details like name, email, social media information, etc.
Accessing Contact Creation
There are multiple ways to access the contact creation page.
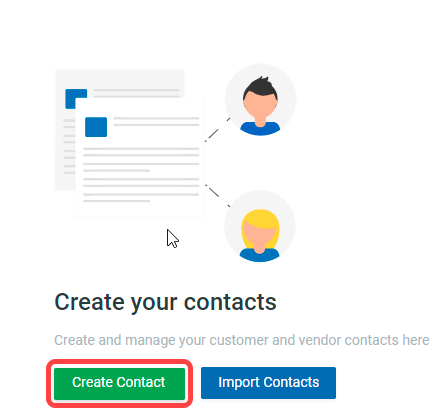
Method 1: Click on the “Contacts” tab in the Navigation Sidebar. When you don’t have any contacts added in SeeBiz Inventory, you’ll see two buttons; “Create Contact” and “Import Contacts”. Click on the “Create Contact” button to add your contacts.
Method 2: Click on the “+“ icon next to the “Contacts” tab to create contacts.
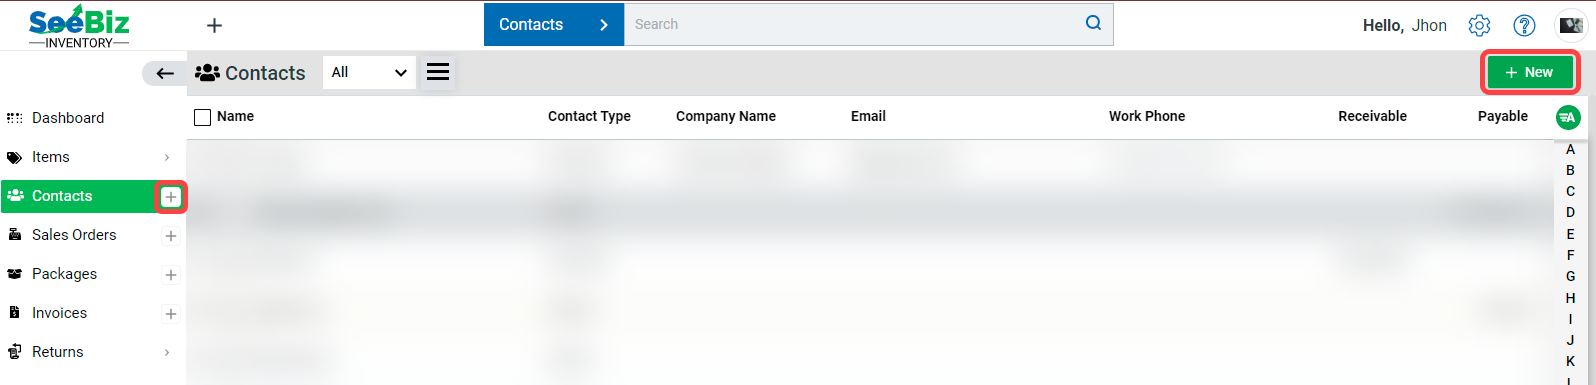
Method 3: If you have already added some contacts, click on the “+ New” button at the top-right of the “Contacts” section to create a new contact.
Creating a New Contact
To create a new contact in SeeBiz Inventory, you’ll need to add their:
- Basic information
- Address
- Other Details
Let’s explore each section one by one.
Basic Information
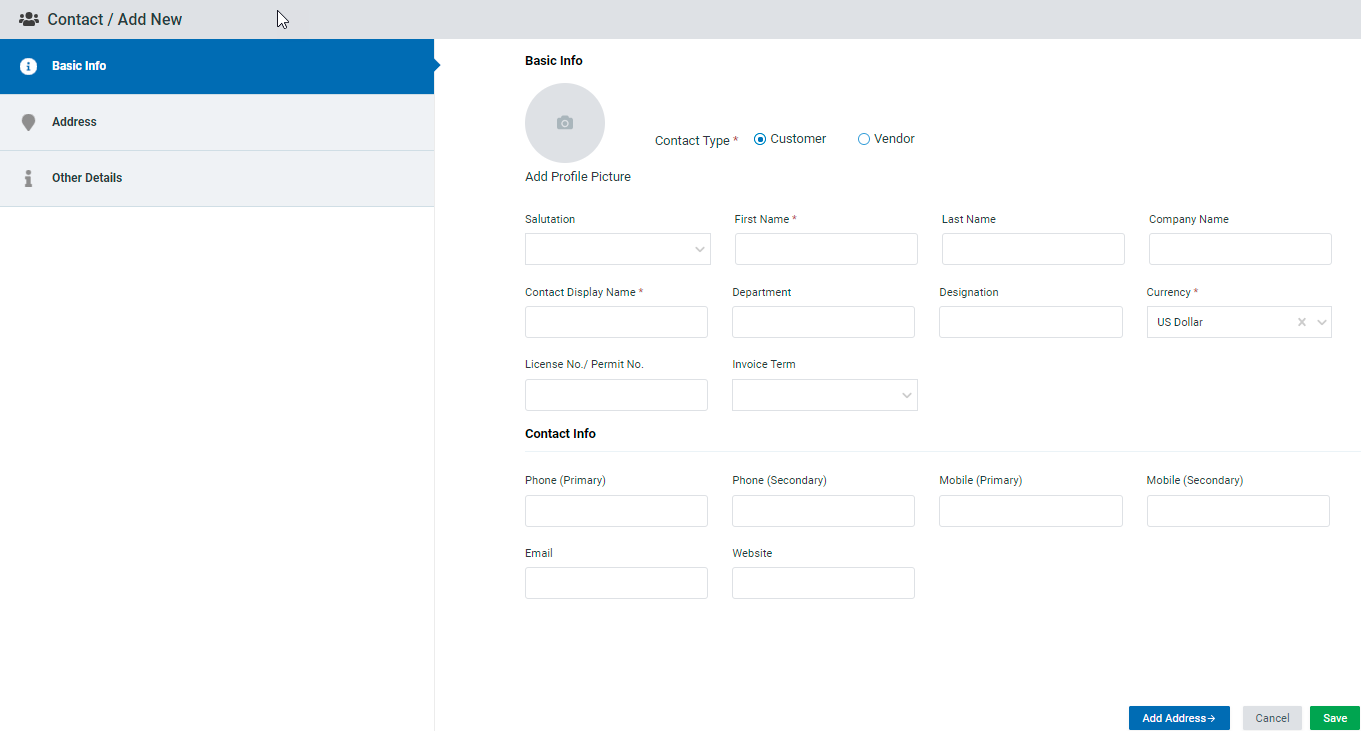
Here, you need to enter the Contact Type, First Name, Contact Display Name, and Currency.
The table below contains a complete description of the fields that should be filled.
Basic Info
| Fields | Description |
| Profile Picture | Add your contact’s picture here. |
| Contact Type | If the contact you are saving is one of your customers, select “Customer”. If it’s one of your vendor’s contact information, select “Vendor”. |
| Salutation | Add the appropriate address here. |
| First Name | Enter the first name of the contact. |
| Last Name | You can add the last name of the contact. |
| Company Name | You can enter the official company name of your contact here. |
| Contact Display Name | Enter the contact’s name that will appear throughout SeeBiz Inventory. |
| Department | You can specify the department of your contact here. |
| Designation | Here you can mention the designation of your contact. |
| Currency | Select the main currency used by the contact. |
| License/Permit Number | You can enter the registered license or permit number of the contact here. |
| Invoice Term | Invoice payment terms are included on all bills sent to clients outlining when we expect payment for our services. Here, “Due on Receipt” means the contact will be paying their order payment as soon as it’s received. Similarly, “Net 30/60” means the contacts can pay up to 30 or 60 calendar days respectively after they have been billed. And “Due on This/Next Month’s End” means that the payment is expected at the end of current or the upcoming month respectively. |
Contact Info
| Phone Number | Here you can add their primary and secondary phone number. |
| Mobile Number | Here you can enter the contact’s primary and secondary mobile number. |
| | You can enter the contact’s valid email address. |
| Website | If your contact has a website, you can add its URL here. |
Address
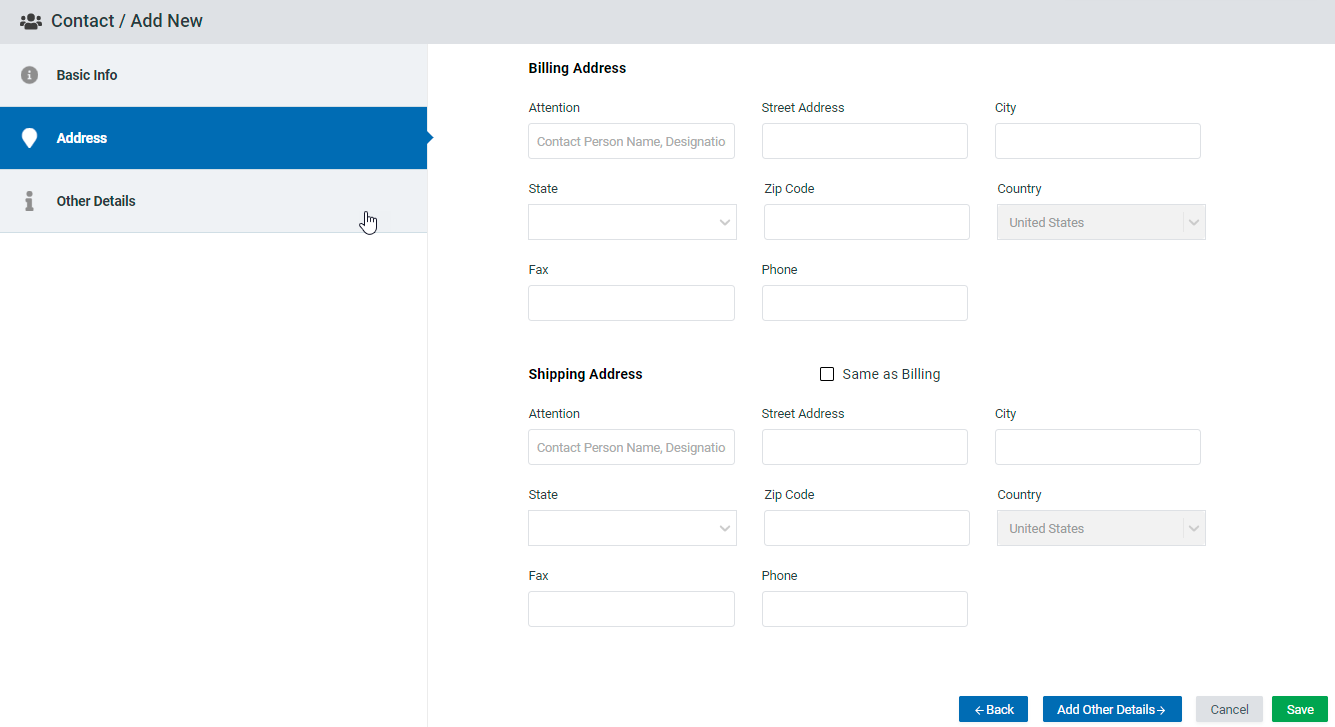
Here you can enter your contact’s billing and shipping address. If the shipping and billing address are the same, check the “Same as Billing” box.
The table below contains a complete description of the fields that should be filled:
| Fields | Description |
| Attention | Contact person’s name and designation |
| Street Address | Here, you can add the address where the contact will be expecting the invoice of any order to be sent. |
| City | You can enter the city where your contact lives |
| State | Here you can add the state where your contact is situated |
| Zip Code | You can enter the zip code of your contact’s |
| Country | Here you can add the country where your contact is situated |
| Fax & Phone | You can enter the fax or phone number of the contact here |
Other Details

You can add all the social media handles of your contact in the “Social” section. Any other notes and memos will go into the “Others Section”.
The table below contains a complete description of the fields that should be filled.
Social
| Fields | Description |
| | Enter the URL of your contact’s facebook profile |
| | Add your contact’s twitter profile link |
| Skype | Enter the Skype ID of your contact |
| | Enter the URL of your contact’s Instagram profile |
Others
| Fields | Description |
| Others | Enter any additional/extra information, descriptions or memos concerning your contact. |
After clicking the “Save” button, all of your contact’s information will be saved.
Suggestion: The information field that aren’t marked with the “*” symbols are optional and can be skipped for now.
